Case Study: Server-side ZK proof generation for Noir circuits with private inputs using TEEs on Kalypso
August 12, 2024 | Contributor
In our previous article, ‘Securing decentralized ZK prover networks through restaking’, we explored the case for prover marketplaces, briefly touched upon the architecture of Kalypso and explained its merits. In this article, we dig deeper into one of its peculiarities: the use of TEEs to operate Kalypso’s matching engine and generate proofs server-side.
The relevance of TEEs
A Trusted Execution Environment (TEE) is a segregated area of memory and CPU which is protected against any other process (including the kernel) from reading data or tampering with the execution of code running in it. This ensures data confidentiality and computational integrity of programs which run in such secure enclaves.
Generation of ZK proofs can be expensive and time consuming. This can lead to lags and a poor user experience when such proofs are generated client-side. However, delegating the generation of such proofs to a server exposes the user’s private inputs leaving them to choose between the devil and the deep blue sea.
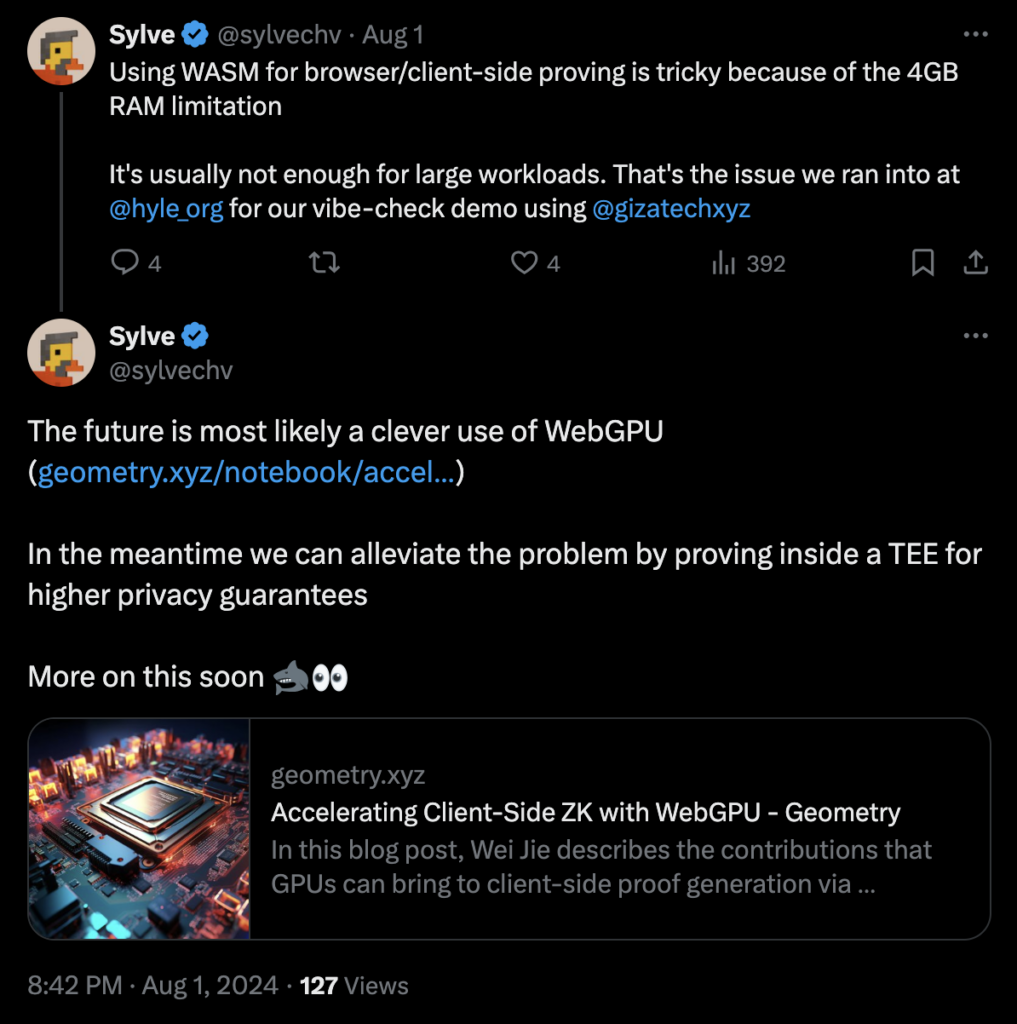
Tweet Credits: Sylve from Hyle suggesting that client-side proof generation is too slow for vibe-check, while pushing it server-side would require use of TEEs to prevent leakage of private inputs.
TEEs are a match made in heaven when it comes to such use cases as they provide almost native server-like performance, can work with GPUs and can maintain the confidentiality of private inputs from both the server host and any network-level adversary through the use of encrypted TLS channels.
Use of TEEs in Kalypso
Kalypso, the ZK prover marketplace by Marlin can be thought of as an orderbook-based exchange that creates a market per circuit. In every market, proof requesters (users) and proof generators (hardware operators) come to an agreement on the price and time it would take to generate a proof. Just as with an exchange, a matching engine matches mutually interested parties whose preferences overlap using a certain matching algorithm.
Here’s where TEEs come into the picture:
A low latency matching engine: The matching engine is required to be decentralized, censorship-resistant, fair and most importantly, operate with a very low latency. These are exactly the properties offered by a TEE-based coprocessor network like Oyster. With practically no caps on memory and processors, an Oyster node allows the Kalypso matching engine to match intersecting orders at latencies no purely on-chain orderbook could.
Enabling resource efficiency: With compute networks like Kalypso, it is important that hardware have a high utilization rate in order to amortize fixed costs. A way to achieve this is to enable hardware operators to register the same machine across markets and delist them only for the time when they are assigned jobs. Such low latency operations are again made possible due to the fact that the matching engine runs in a TEE.
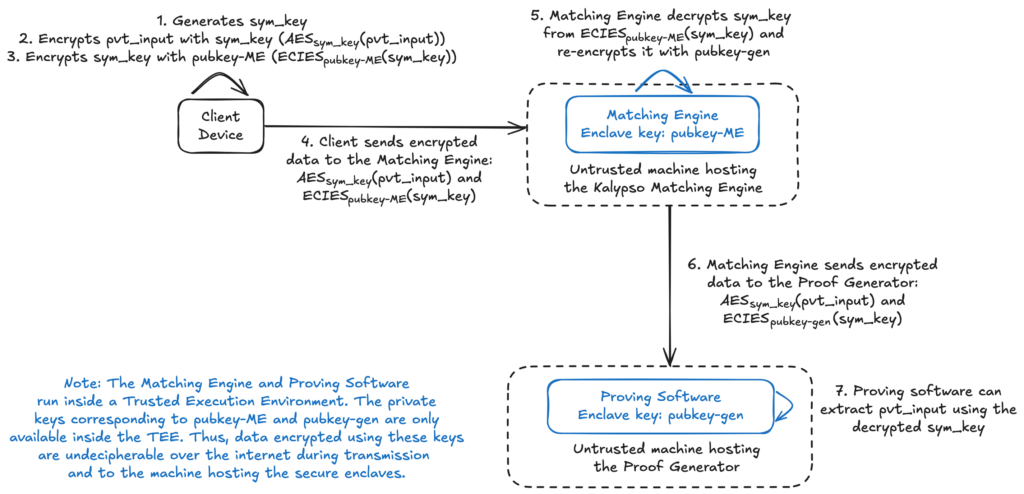
Maintaining confidentiality of private inputs: Proof generators can optionally join markets where private inputs are involved and use TEEs when generating proofs. Since the matching engine itself runs in a TEE, private inputs can be securely shared between users and hardware operators to maintain the confidentiality of private inputs in transit, at rest and while processing.
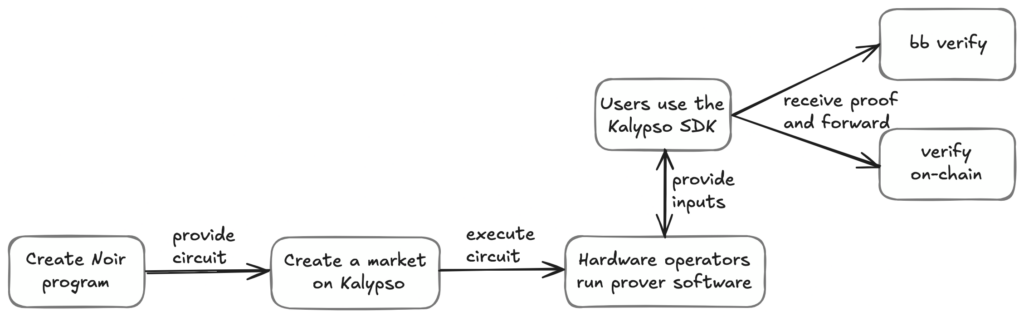
Given this background, let’s try to generate proofs for a Noir circuit.
A bit about Noir
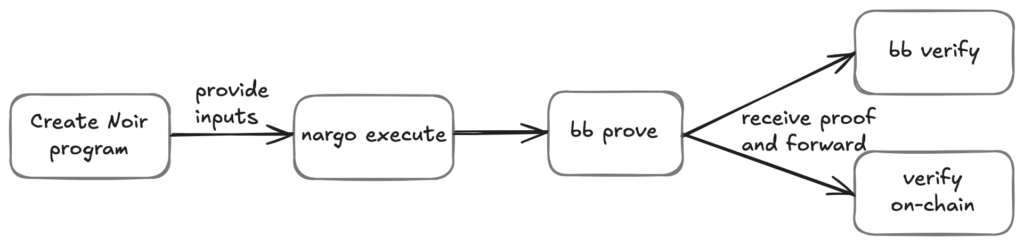
For purposes of brevity, we’ll refer readers to user zkjimmy’s description of Noir on the Research Forum. The information relevant to follow through the sections below is to know that programs written in Noir can accept private inputs and that today a local interaction with a program written in Noir looks something like this:
This works perfectly well (at least for small circuits) but as was described by Sylve in his tweet referenced above, such client-side proof generation isn’t always desirable, especially for resource constrained environments (e.g. web browser on mobile). Kalypso solves this problem by letting specialized hardware operators run the prover at scale:
Running a Noir prover with Kalypso
We’ll be using a dummy Noir circuit in this walkthrough. Since the circuit involves private inputs, the proving software has to be run inside an enclave. Kalypso provides an enclave template that can be customized based on requirements. We’ll be skipping details here and assume that a market for this circuit has already been created. For further information to understand the granularities, please refer to the docs.
The repository includes the following files and directories:
prover-executable (binary)
generator-client (binary)
kalypso-listener (binary)
Dockerfile
setup.sh
supervisord.conf
build.sh
Update the Dockerfile
Then, update the Dockerfile to include the circuit repository:
# Provide the GitHub link to your circuit repo
RUN git clone https://github.com/marlinprotocol/noir_enclave_setup.git
Alternatively, manually copy your circuit project into the Docker environment.
Create the configuration file
Create a config.toml file and define the paths:
toml_path = "/app/{project_name}"  # Path where Nargo.toml will be located
output_path = "/app/{github_project_name}/proofs/{project_name}.proof"  # Path for proof output
Run the build.sh script to build and deploy your enclave.
Registering the prover with the Kalypso marketplace
Since we have assumed that a market for this circuit has already been created, the hardware operator only needs to use the kalypso-sdk and a few API calls to register the prover in the marketplace. This will enable the prover to securely receive and handle proof requests.
Requesting a proof using the kalypso-sdk
Once kalypso-sdk is set up, requesting a proof is straightforward. Here's how to do it:
Create an Ask Request
Use the createAsk API to request a proof. For example: