A primer on staking as a receiver in the Marlin network
February 28, 2023 | Contributor
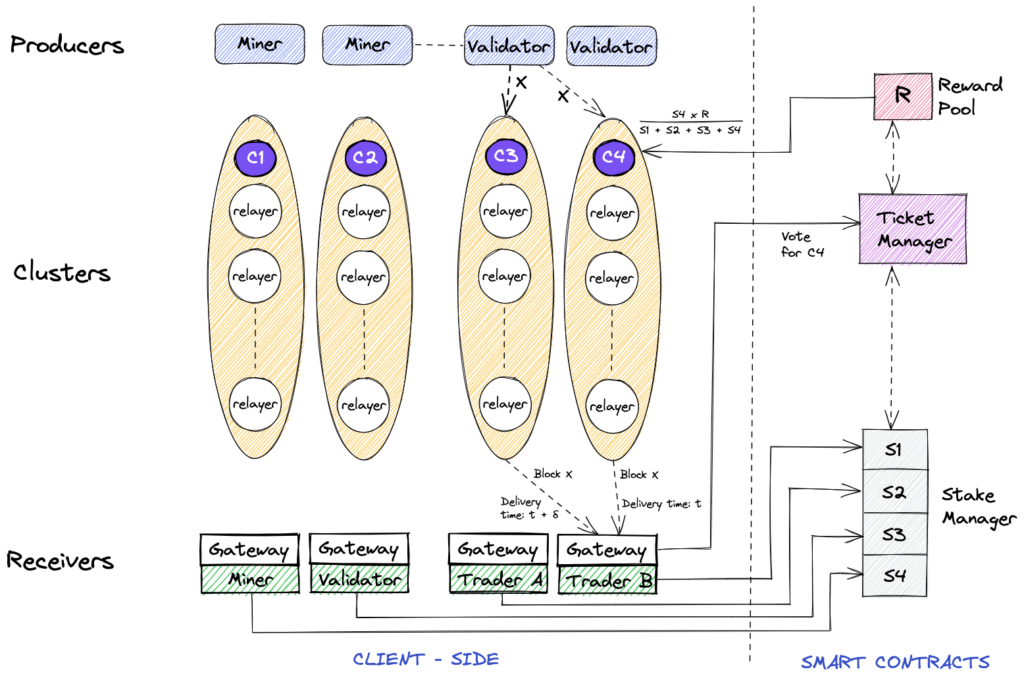
Receivers in the Marlin network are nodes which use Gateways to receive blocks and transactions from the clusters in the network. They in turn give tickets to the clusters they first receive data from which is used by the protocol to determine the best performing clusters and thus reward them appropriately. At the moment, this design is vulnerable to sybil attacks as theoretically clusters can reward themselves tickets by running phantom receivers without any additional expense.
The introduction of receiver staking solves this issue by making it costly for any malicious cluster operator to run such virtual receivers. As receivers are not rewarded monetarily for staking POND, there’s an opportunity cost to staking POND as receivers to be able to send themselves tickets for no real work versus delegating that POND towards their cluster and genuinely propagating data as per the protocol’s rules. Since clusters that send data are chosen randomly for every epoch, the uncertainty and reduced probability of being chosen (by not delegating the excess POND to their cluster) makes it especially irrational to cheat.
Economics of staking as receivers
The crypto-economics behind staking as receivers is fairly simple.
Receivers stake POND (and not MPond like clusters)
There are no staking rewards or fees given to receivers (the reward is the service they receive from the network)
The amount of rewards they are able to direct to clusters (by claiming them to be the most performant for them) is directly proportional to their stake in the network compared to the total tokens staked by all receivers
Are cluster operators required to do anything?
No. Any client changes or registration are solely restricted to receivers. Cluster operators can however expect a few changes going forward.
Prior to receiver staking, all receivers had an equal say in determining the most performant clusters. However, after this change, their inputs will be weighted by their stake. This may lead to a change in the distribution of rewards amongst clusters based on their relative performance to the different receivers with diverse stakes.
Post receiver staking, much more complex calculations will have to be carried out in smart contracts. As a result, the epoch length (the time after which clusters selected for propagating data are shuffled) will be increased to about 15 minutes. This change may lead to a variance in the work to be performed and associated rewards as some clusters might not be chosen for some time. On the other hand, when chosen they would have to propagate data for a longer stretch. This might also enable some creative server optimization to reduce hardware usage.
Updates required of receivers
Receivers will be required to perform two primary activities:
Step 3: Create env file using the below example as a template
ARBITRUM_RPC_KEY="https://<RPC URL>"
SIGNER_PRIVATE_KEY="< Signer Private Key >

# Recevier Database Config
RECEIVER_DATABASE_HOST="localhost"
RECEIVER_DATABASE_USER="postgres"
RECEIVER_DATABASE_PASSPWORD="postgres"
RECEIVER_DATABASE_NAME="receiver"
RECEIVER_DATABASE_PORT="5432"
RECEIVER_DATABASE_MAX_CONNECTIONS=5

# Replace it with name if required
NETWORK_ID="0xaaaebeba3810b1e6b70781f14b2d72c1cb89c0b2b320c43bb67ff79f562f5ff4"

#SUBGRAPH
SUBGRAPH_URL="https://api.thegraph.com/subgraphs/name/marlinprotocol/staking"

# How to run the job
RUN_JOB_AFTER_MILLISECOND=120000
IF_FAILED_RETRY_AFTER=120000

# Runtime optional configuration
GAS_PRICE_INCREMENT="110" # this means gas price will increase by 10% if unmined transaction is found, default = 110
MAX_EPOCHS_PER_TRANSACTION_TO_SUBMIT=96 # default=96
MAX_GAS_LIMIT="1000000" # default=1000000
MAX_OBJECTS_PER_SUBGRAPH_QUERY=999 # default=999
Step 4: Run `sudo marlinctl gateway eth --bootstrap-addr 34.96.107.116:8002 --spamcheck-addr <abci-geth-ip>:8545 --env /path/to/.env` to set up an updated eth gateway with ticket submission integrated
Steps to stake as a receiver
Before proceeding forward, please keep in mind that:
This guide is for receivers who wish to receive data from the Marlin network.
The smart contracts allow a 3rd party address to delegate POND to receivers. This is a convenience feature for receivers themselves. Any delegated POND can be withdrawn by the receivers using their registration address. Thus, it’s not recommended to delegate tokens to receivers.
Users looking to participate in the Marlin network as cluster operators should visit the operator portal.
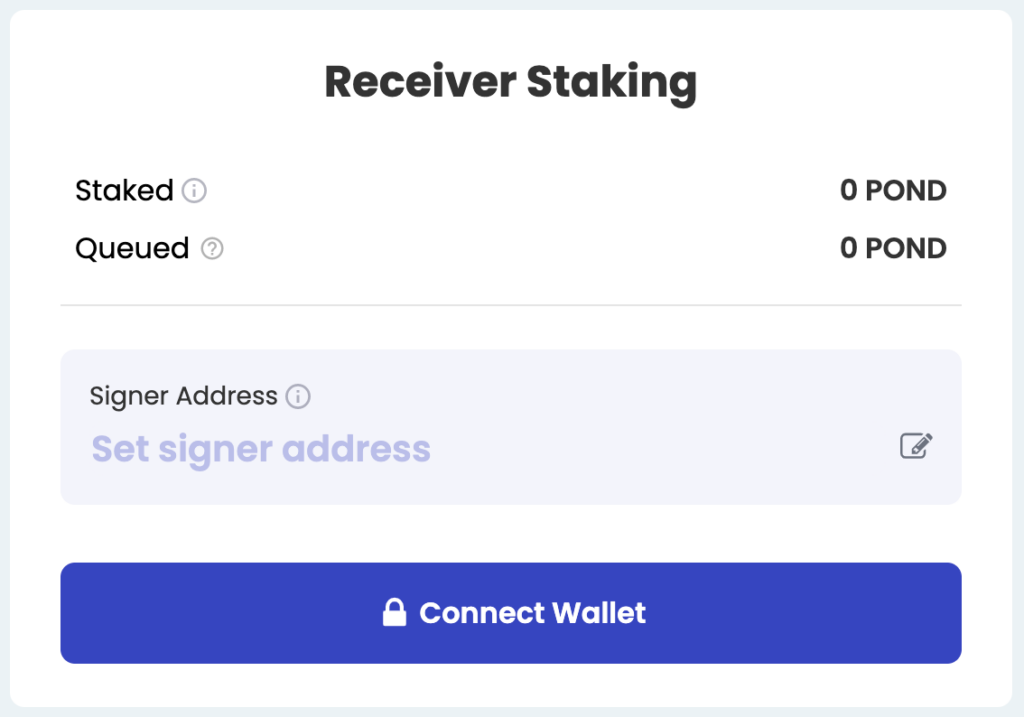
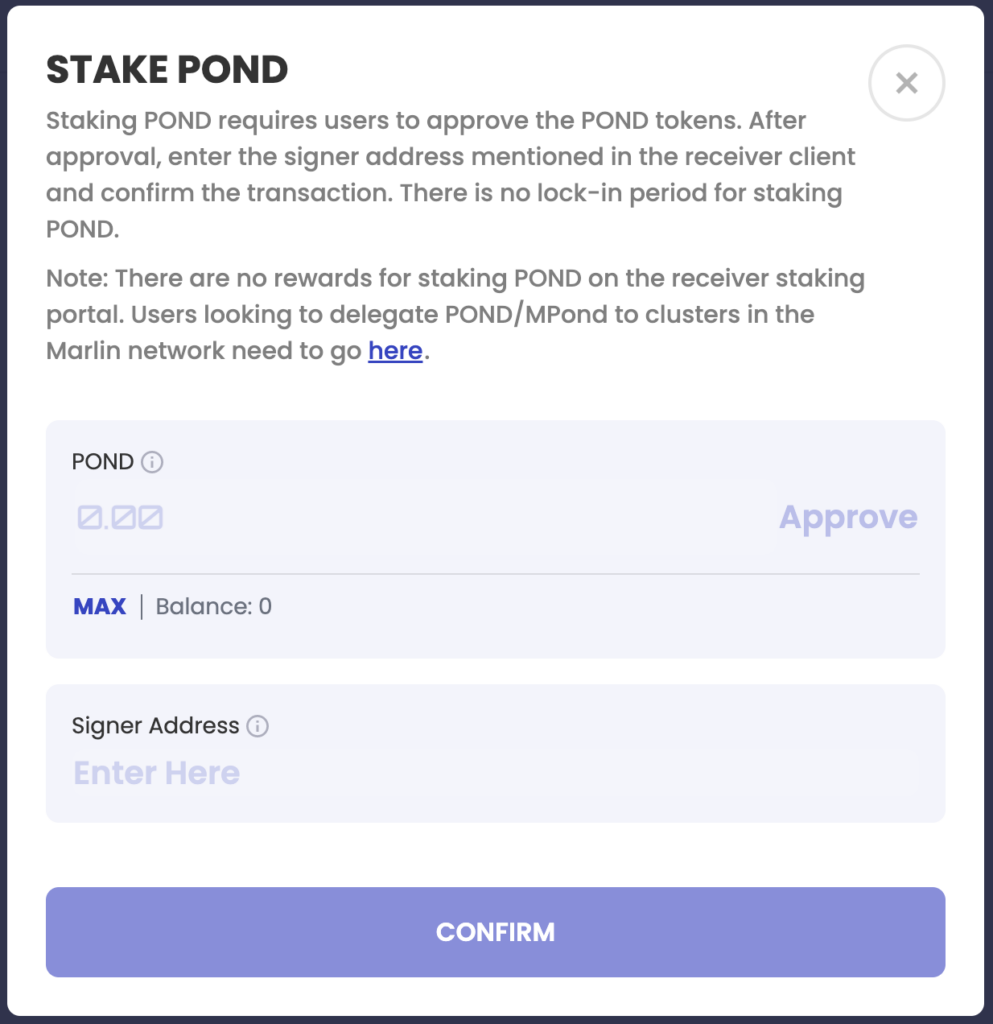
After connecting your wallet, click on the ‘Stake’ button. Ensure that you have POND in the connected wallet.
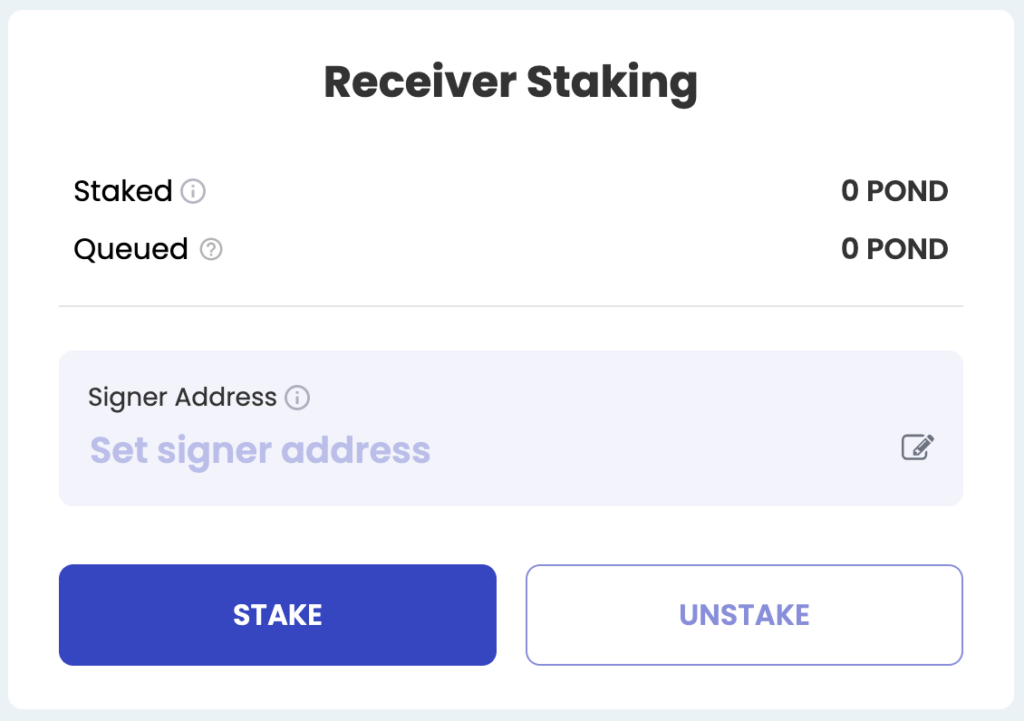
Step 3: Staking POND and setting the signer address
Enter the amount of POND you wish to stake to the receiver address. After approving the transaction, enter the signer address and confirm the transaction. The signer address is the address used by the receiver to give tickets to the cluster and can be found in the receiver client.
Upon confirmation of the transaction, the staked POND will appear in the ‘Queued’ section. After the epoch is over, the POND would move to the ‘Staked’ section. Hovering over the ‘alert’ icon would display the remaining time for the epoch. Each epoch is 15 minutes long.
Your signer address would also appear in the main page.
Once the epoch is over, the receiver can start giving tickets to clusters for receiving blocks. The deposited POND will be considered towards tickets starting next epoch.
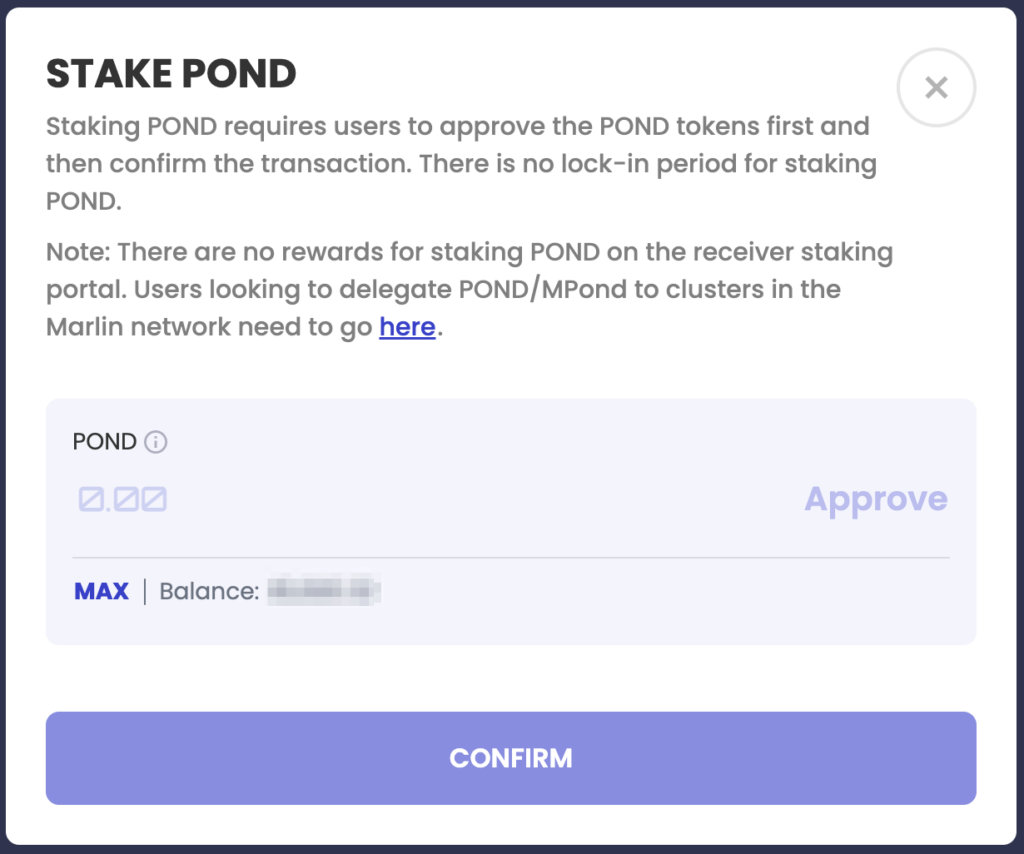
Step 4: Staking more POND
To stake more POND to your receiver address, click on the ‘Stake’ button and follow the same process as Step 3 (sans the signer address input section).
Step 5: Changing the signer address
To change the signer address, click on the ‘edit’ icon next to the signer address on the main portal.
Enter the new signer address in the pop-up and click on ‘Update’ to confirm the transaction.
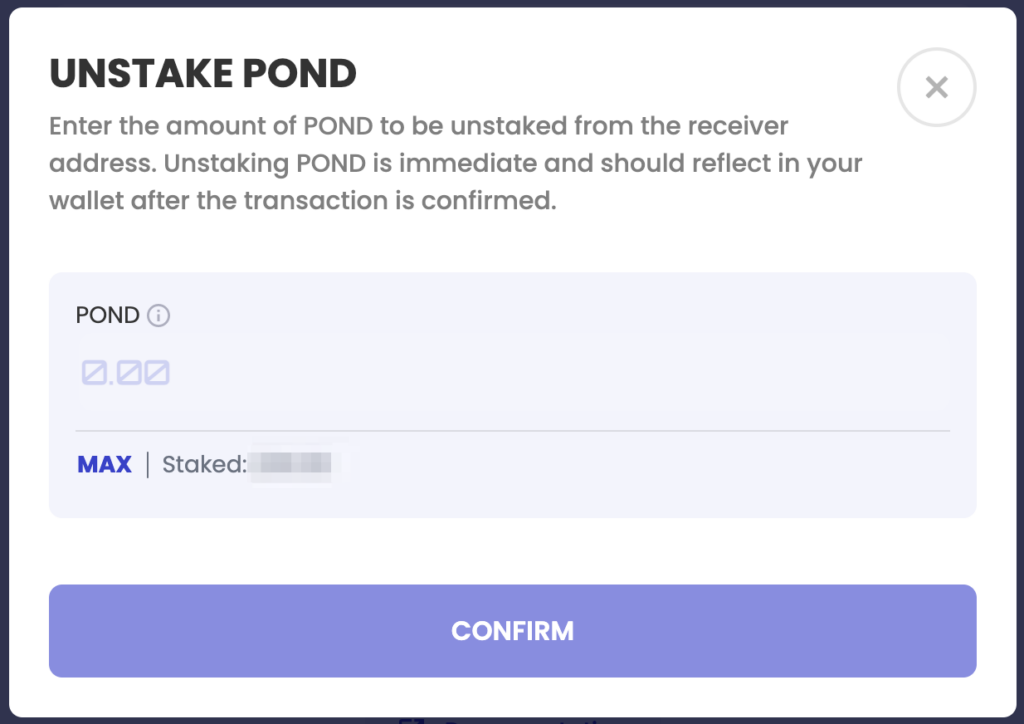
Step 6: Unstaking POND
Click on the ‘Unstake’ button, enter the amount of POND you want to unstake and confirm the transaction. Unstaking POND is immediate but the amount unstaked is not considered towards tickets given for the current epoch and should reflect in the connected wallet after the transaction is confirmed.
And with that, you’re all set!
Reach out on Discord in case you have queries/require assistance and follow our official social media channels to get the latest updates as and when they come out!